Sunday, December 19, 2010

String Chandeliers

Photo courtesy of Wednesday Custom Design Events & Paperwork

Jessica at Wednesday Custom Design Events & Paperwork (http://wednesdaycustomdesign.com/events) tells you how to make these great string balls that you can use for either centerpieces or as chandeliers to hang from the trees outside.  The bright white accented with flowers in your wedding colors adds a custom look at a DIY price.  These are so easy you could rope in your flower girl to help make them!  Wednesday Custom Design also has lots of other great ideas to make your wedding day pop!  So head on over to their web site and blog and enjoy a feast for you DIY eyes!

Tuesday, November 30, 2010

Highlight Your Food Choices by Using Colorful and Unique Vegetables

Photo courtesy of: TheBearFootShaman

As an Etsy addict and a DIY bride, when I came across an Etsy store, TheBearFootShaman I saw a way to marry my love of gardening with gorgeous food presentation for a wedding or shower. At TheBearFootShaman they have heirloom seeds for sale for absolutely gorgeous vegetables! Take the time to browse the store for vegetables to brighten your wedding day food selections. Even if you aren't serving the food cooked, some of these would make a great part of a crudite or chesse display.

My favorite is the Five Colors Swiss Chard. These colorful plants are almost impossible not to grow! They will grow in places where there isn't enough sun or too much sun as well as where the soil grade is poor. You can cook them like spinach for a colorful side, after all, why serve ho-hum green beans with almond when you can highlight your plates with this gorgeous vegetable?

Purple Cauliflower from Sicily Photo courtesy of TheBearFootShaman

This gorgeous purple cauliflower is a great accent vegetable or perfect for hors d'oeuvres. Use it as a dip bowl by hollowing it out. Surround it with cheeses. The options are endless. And not to be a killjoy but it's also good for you!

TheBearFootShaman offers additional seeds from other heirloom varieties, so head on over. Even if you aren't planning a wedding the seed choices will jazz up dinner any night of the week. Visit the site at Etsy.com for lots of other choices like pear shaped tomatoes, chocolate color peppers and more!

Wednesday, November 10, 2010

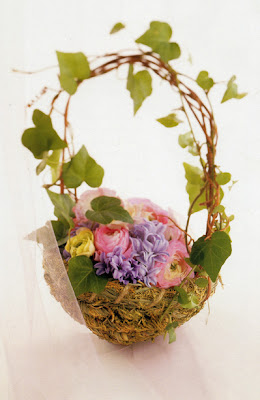
DIY Flower Baskets From Save On Crafts


You too can make this designer-look birdsnest bouquet.  Just go to http://saveoncrafts.com/ under the heading: Weddung DIY Decorations for directions as well as the products you need to purchase to make these for your bridal party.  It's simple, you can order everything you need from them (except fresh flowers), and you can put everything together ahead of time just adding the flowers on the day of your wedding.  I highly recomment this craft site for both your wedding DIY projects and any other projects, they're prices are great and the service in phenomonal.  Have fun! 

Envelope Template If You Are Making Your Own Invitations

Photo courtesy of http://www.spoonsisters.com


If you are creative or crafty you're probably making your own invitations. But you still need envelopes. This template, available for only $16.95 from http://www.spoonsisters.com/ makes envelopes simple and easy. It allows you to create envelopes that measure: 4.5 inches W x 6.4 inches W; the template measures 7.8 inches W x 11 inches H, W x 0.1 inches thickness. It is an International Standard Size, Format: C6 and suitable for content format: A6 (or A4 folded in half twice). If you invitation is an different size you should be able to adapt the template fairly easily. Because it's made of wood it will last so you can use it for other projects after your wedding (maybe some creative thank you notes?).

Sunday, October 10, 2010

NIRVANA! Try These Nuggets of Bliss!

All photos and linked recipe courtesy of Colette at My Computer is My Canvas on Blogspot.com

These look soooo good right? And hidden inside these chocolate nuggets of goodness is raw chocolate chip cookie dough! My personal idea of HEAVEN! I can't take credit for these, but found them while I was looking for a project for my daughter's nursery school class.


Colette of "My Computer is My Canvas," on Blogspot.com has taste tested the best of all the Raw Cookie Dough recipes she could find with her sister, Lisa of Lisa's Recipe Cards (also on Blogspot), and the results are on Collette's blog at http://mycomputerismycanvas.blogspot.com/.  Just look under the heading recipes for the exact recipe. She has found a recipe that tastes great even without the eggs so you can enjoy these to your hearts content with no worries (other than the pounds you could put on your hips!)


Not only that, she has ingeniously dipped them in chocolate turning them into a treat for the most discriminating of guests. For your wedding, think of adding some icing flowers in colors to accent you color scheme or make them into cookie dough pops if you are feeling extra crafty! For any bride who is a DIY'r her blog is full of great projects that could be adapted for use in your wedding. I guess you could say I'm a fan, with a capital 'F'! Head over to her blog for further ideas for these wonderful melt in mouth wonders and more ideas for your wedding.

Saturday, October 2, 2010

Mini Glass Flower Pots

Photo and design courtesy of: http://www.favorsandflowers.com/mini-glass-flower-pots.htm
Fill these mini glass flower pots with water a freshly cut flowers, they can also be used as votive holders. Each clear glass pot measures 2.5" tall. Top diameter is 2.75” and bottom diameter measures 1.75". Holds up to 4 oz. Fits votive and tea light candles. The perfect holder for any votive candle. Pots are $1.30/each. 

Photo courtesy of: http://www.favorsandflowers.com/mini-glass-flower-pots.htm


Do It Yourself Fortune Cookies -- Recipe Included

Photo courtesy of: http://www.favorideas.com/

Not interested in paying a wedding favor company for fortune cookies, or just want to control the fortunes in the cookies? Why not make your own? The reciple below makes a dozen great fortune cookies that you can either serve plain or with some sherbret. Cookies can also be dipped in chocoloate! Or the dough can be dyed an assortment of colors. Yum!

Fortune Cookie Recipe
Makes one dozen cookies.
Ingredients

1 egg white

1/8 teaspoon vanilla extract

1 pinch salt

1/4 cup unbleached all-purpose flour

1/4 cup white sugar

Directions
Preheat oven to 400 degrees F. Butter a cookie sheet. Write fortunes on strips of paper about 4 inches long and 1/2 inch wide. Generously grease 2 cookie sheets.
Mix the egg white and vanilla until foamy but not stiff. Sift the flour, salt, and sugar and blend into the egg white mixture.
Place teaspoonfuls of the batter at least 4 inches apart on one of the prepared cookie sheets. Tilt the sheet to move the batter into round shapes about 3 inches in diameter. Be careful to make batter as round and even as possible. Do not make too many, because the cookie have to be really hot to form them and once they cool it is too late. Start with 2 or 3 to a sheet and see how many you can do.
Bake for 5 minutes or until cookie has turned a golden color 1/2 inch wide around the outer edge of the circle. The center will remain pale. While one sheet is baking, prepare the other.
Remove from oven and quickly move cookie with a wide spatula and place upside down on a wooden board. Quickly place the fortune on the cookie, close to the middle and fold the cookie in half. Place the folded edge across the rim of a measuring cup and pull the pointed edges down, one on the inside of the cup and one on the outside. Place folded cookies into the cups of a muffin tin or egg carton to hold their shape until firm. (Recipe courtesy of: Allrecipes.com)

Photo courtesy of: http://www.favorideas.com/


All You Need is LOVE! Cookie Cutters That Is

LOVE Cookie Cutter from FancyFlours.com


This tin cookie cutter with sturdy tin handle comes with a colorful recipe card. Each card includes a recipe for cookies and frosting. The cookie cutter is S 4"H and shaped in beautiful, durable solid tin.

Get this and other unique cookie cutters at FancyFlours.com. Fancy Flours is a unique, retail on-line baking supply business that specializes in high quality, difficult to find ingredients and delightful, edible sugar decorations and cookie cutters.

Fancy Flours offers over 800 collector's copper and easy-to-use tin cookie cutters, 100 different types of hard-to-find oils, extracts and flavorings, premium vanillas, muffin cups in every color you could ever dream of, more then 500 sugar whimsies, stunning cake jewels, intricate wafer paper designs and much, much more! Fancyflours.com will bring out your aristic, whimsical, imaginative, and even magical side.

Browse their selction of chocolate transfer sheets and culinary stencils, the perfect touch to party treats and desserts. Need to add a bit of color to your cupcakes? Try one of our brilliantly colored food sprays or icing writers, a darling cupcake pick, or shimmering edible pearls.

Fancyflours.com also provides you with mouthwatering recipes, valuable tips and how-to's, as well as a current blog featuring the latest in baking trends.

So no matter what baking project you are planning on attempting, Fancy Flours is your one stop shop for everything you need to produce professional looking and tasting projects.

Saturday, September 25, 2010

DIY Kid Friendly Favors

Photo and Idea from Offbeatbride.com DIY section
If you're having children in your wedding or as guests at your wedding, you might want to provide kid-friendly favors. These DIY favors are courtesy of http://offbeatbride.com/. Gwenab on The Offbeatbride's site gives you the specific directions as well as links to the sites she learned how to make these from under the DIY section of the site. Lego actually has a ice cube mold (go to http://shop.lego.com/). You can use this to make crayons in the shapes of lego men! Kudos to you Gwen! Great idea and execution! Other suggestions included stars and other fun shapes.

Photo and product from http://shop.lego.com/


Wednesday, September 22, 2010

Flower Duet Offers A DVD to Learn How to Create a European Wrap Bouquet


If you know a bride who wants to learn how to make her own wedding bouquet, consider ordering a copy of  "How to Create A European Wrap Bouquet".  This DVD is a great gift for the newly engaged bride.  Having the DVD will take the mystery (and terror) out of designing your own wrap bouquet.  You can see a preview of the flower arranging DVD on their homepage or just go ahead and order it from the order page.

Saturday, August 28, 2010

Designs for the DIY Bride

Photo from Doverpublications.com

Dover Publications designs books filled with monograms and designs perfect for the DIY bride. Also if you sign up at their web site they will send you freebies that you can use to design wedding accessories or for other DIY projects. Many of their books come complete with a CD-ROM filled with designs. You can either purchase their books online or at Borders Books.   Try the Amazon.com search function provided on this site to see what Amazon has in stock!

Saturday, August 14, 2010

Jones Soda With Personalized Labels

Photo courtesy of Jones Soda at http://myjones.com/

Jones Soda will personalize bottles of their fabulous soda for you, but the only problem is it's almost thirty dollars for twelve, a pretty pricey wedding favor. Instead purchase cases of their soda at less than half that price and make your own labels. Choose your favorite soda or a combination of flavors so guests have an option. Be sure to ask for discounts if you are buying this in bulk. Most stores will offer you a discount for large bulk purchases. If the first place you try won't do it, just keep trying. Even a 10% discount when you're planning a wedding adds up in a hurry.


Sunday, August 1, 2010

Candles -- Easy DIY Centerpieces

Photos and ideas courtesy of: http://www.surroundings.com/

Surroundings.com offers you a large selection of floating candle kits and craft items needed to make DIY centerpieces for your wedding.  Candles offer an inexspensive alternative to large floral arrangements and add to the ambiance of your day.  This is a go to place for candle kits, accessories, and centerpiece ideas for you wedding day. 


Wednesday, July 21, 2010

DIY Shoe Upgrade For Your Wedding


Photo courtesy of: http://www.zappos.com

Pearls and beading decorate this utterly feminine open toe pump. Luxurious satin upper. Large sparkling stone at back of heel. Man-made lining. Satin-covered heel. Leather sole. 4" heel.

These shoes are gorgeous and perfect for your wedding day. Don't forget though you can add lace, beading, and sparkle to your shoes on your own. Some hot glue, lace and a little careful application can give you designer shoes at Payless Prices. Have your shoes dyed first, then add your lace or bling.

Thursday, July 15, 2010

Cookies Stencils


All Photos and product courtesy of: http://www.coppergifts.com/


Copper Gifts offers this combination of stencils to go with their cookie cutters.  The stencils make it simple and easy to decorate your cookies with intricate designs.

Monday, June 28, 2010

DIY Russian Friendship Tea

Russian Friendship Tea

Photos and Recipe from: http://www.bakeitpretty.com/

Make your guests a jar of Russian Friendship Tea for a wedding favor. Served at the Biltmore, this tea is sweet, with a touch of citrus and spice and is perfect to give at winter or even fall weddings.

Russian Friendship Tea Mix Recipe

(Russina Friendship Tea Recipe from Bake It Pretty Blog:)

2-1/2 cups Instant Orange Drink Mix (like Tang)

1-1/2 cups Instant Lemonade Mix (like Country Time)

1-1/2 cups Instant Unsweetened Tea

1/2 cup Sugar

1 teaspoon ground ginger

1 teaspoon ground cinnamon

1 teaspoon ground allspice

1/2 teaspoon ground cloves

(all spices are the dried, ground kind- not whole!)


In a large bowl, whisk together all ingredients until thoroughly combined. Use a funnel to add one cup of hte mix to a jar or bag. If you want some pretty labels go to: http://www.bakeitpretty.com/blog/2009/12/holiday-how-to-russian-friendship-tea/ Where there is a PDF file to print with directions on how to make the tea on the back. While you are there take a look at the rest of the great blog and site! You'll fall in love!

Sunday, June 13, 2010

Photo Ops You Engineer

Photo courtesy of http://everylastdetailblog.com/ sent to them by Jessica Loren

Just make your own Mr. and Mrs. signs and you can have your photographer or friends take this cute photo of you and your new spouse.

Monday, June 7, 2010

Wedding Flags


Photo and idea courtesy of Offbeat Bride Website
Posted by Megan and Michele


Photo and idea courtesy of Offbeat Bride Website

Posted by Megan and Michele
Back of Flags above

Another option, Flags with your monogram
Brides everywhere will get wonderful inspiration from Michele at Offbeat Bride who made these great flags for her wedding party to hand out to show their enthusiasm as the bride and groom were walking out of the church.  Michele opted to make them from construction paper, and used her sewing machine to make a seamed placket to put a wooden dowel into.  She said "I put a few drops of glue on the sticks, mainly because she didn't want the flags sliding down the dowels. Then folded the paper around, and did the stitching with a zipper foot- they ended up being fairly tight."  What a great way to let your guests show their enthusiasm for your new marriage!  Shades of Monty Python!  "And there was much rejoicing!"

Photo courtesy of Martha Steward Weddings, where there are template to print.
 

Tuesday, June 1, 2010

Rosemary Sea Salt Favors

Photo and idea courtesy of Marth Stewart Weddings


Rosemary is the herb of love and remembrance.  Rosemary sea salt favors are perfect for your beach wedding.  Your guests can take it home and use it to make focaccia or to sprinkle over potatoes.  Prepare it using the recipe below, label the container and add an initial sticker and wedding date. 

Rosemary Sea Salt Recipe

Makes 8 cups

This herb-infused salt is fragrant and can be substituted for unseasoned salt in any savory recipe.

Tools and Materials

1 three-pound box kosher salt (about 8 cups)
Bunches fresh rosemary, plus more for garnish

Rosemary Sea Salt How-To

1. In a large, high-sided saute pan, combine salt and rosemary. Place over medium heat, and warm through, about 10 minutes. Transfer salt and rosemary mixture to a container. Let cool 5 minutes, uncovered; then cover with an airtight lid. Let stand at least overnight.

2. When ready to fill containers, discard old rosemary. Fill desired containers with salt, and garnish top and sides with a fresh sprigs of rosemary; seal containers.

DIY Wedding Flowers, Rules for the Road -- DIY and Stay Calm


Do It Yourself -- The good thing about doing it yourself is there are very few rules! But here are a few suggestions that may help you on your road to becoming a CALM DIY bride.


1.  Don't let DIY intimidate you.  Let your creative side out to play.  Remember, this is YOUR day, not a wedding planners, not your mother's or his mother's.  So be creative and be YOU!
2.  Buy your fresh flowers from a local grocery store.  Talk to the manager or manager of their floral departments and let them know what flowers you need.  Be sure they order enough for you.  The prices will be better than getting them through your florist.  Try Whole Foods, Trader Joe's, Costco etc.
3.  Consider using creative vessels.  Go wth mason jars, flea market finds or old vases from a yard sale.
4.  Cut stems at and angle.
5.  Flowers should not be more than twice the height of your vase.  Don't let the blooms overwhelm the vase.
6.  Consider using just one flower, or just one color flower with some greenery.  It's less expensive and easier to arrange.
7.  Don't be afraid to ask for help.  A DIY wedding doesn't mean a do it BY YOURSELF wedding.  Enlist the help of parents, bridesmaids, sisters etc. 
8.  Remember, enjoy your DIY projects, especially flowers.  If they are about to overwhelm you, it's time to get a professional to help you out.

Pink and White Easy DIY Flowers


Photos and designs courtesy of: http://www.tableart.net/

Planning on using a pink and white theme for your wedding? Want DIY flowers that are fast and easy? Try this pink and white Gerber daisies in a variety of tall and shorter displays. The lower ones are clear acrylic trays with a combination of votives and Gerber daisies (you might want to use battery operated votives for this or be sure your acrylic will withstand the heat from your candles). The tall vases have black rocks in the bottom and the flowers just stack up to the top. The third photo is round 'fishbowl' vases with a floating Gerber supporting a clear acrylic tray. Trays are perfect for your buffet table, especially for your hors d'oeuvres. Fast, easy, and not too expensive! Especially if you are doing it yourself.


Photo and design courtesy of: http://www.tableart.net


Photo and design courtesy of: http://www.tableart.net

Sunday, May 30, 2010

Virtual Tool To Help You Select Linens


Searching for the perfect tablecloth is a lot easier now with this great tool provided by BBJ Linens called the "Design Your Event Table" virtual tool. This tool allows you to try different tablecloths, napkins, types of chairs and chair accessories before you order them. Perfect for event planners as well as the DIY bride when it comes to those crucial decisions.

Unfortuantely they don't have it set up so you can add your flowers, china and crystal choices, but I'm sure it's in the works, if not at this site then somewhere else!

Saturday, May 29, 2010

Chocolate Dipped Biscotti with Non-Pariels

Photo courtesy of www.ladyfortunes.com/Picture_Biscotti_p/pcbsct-mini.htm

Choose a Biscotti flavor either Chocolate Chip or Double Chocolate Chip are good flavors. They're perfect for dunking into your favorite hot or cold beverage.  Melt some chocolate and dip! Edge with delicate non-pariels and you can either pipe your initials onto the cookies or order custom chocolate to put on them.  These are some of the most attractive cookies I've come across in awhile.   If you don't want to go the DIY route, http://www.ladyfortune.com/ makes the one's as pictured above.

DIY Wedding Cookies

Photo and idea from: http://www.ladyfortunes.com/

Want some cute cookies to give to your guests?  Try these chocolate covered oreos dipped in pretty pink, red and white hearts.  First buy some Double Stuff Oreos.  Melt your chocolate (either white, milk or dark).  Dip cookies once and let them dry.  Redip then cover with heart shaped sprinkles.  You can order those online but I found some at a bargain price at Home Goods and TJ Maxx stores.  After they are dry through, pack in clear plasticine bags and add a cut card.  Perfect inexpensive wedding favors.  If you don't want to go the DIY route, you can purchase them ready made from http://www.ladyfortunes.com/

Friday, May 28, 2010

Dyeing Your Crinoline, a Complete Guide


A bride on The Wedding Bee (http://www.weddingbee.com/) gives these directions for dying your crinoline.  Some brides like to dye them blue, some a pretty pink, the choice is yours.  The directions are as follows (I only tested them on a little girls crinoline to save money so follow with care). 

Most important:  Buy a crinoline that is NOT polyester.  The bride who posted used a nylon taffeta crinoline she purchased at David's Bridal.  Her info is that all David's Bridal crinolines are nylon, though it's possible that has changed, so check the tags.
Photo courtesy of: www.weddingbycolor.com/futuremrsfox
First run the crinoline through the washer with a small amount of soap; wash it on delicate to remove any sizing or fixative in the fabric.  Then take out the crinoline and untangle it.  (You might want to put a piece of plastic on the floor to catch all the water it can get messy). 

Next fill the washer basin up halfway (she has 4 settings, as do I, and she used the 2nd setting) with hot water. Stop the washer before it starts to agitate.  Be sure your crinoline is still wet through.  Add your liquid dye to the water in the washer. 

With a wet crinoline in your hand, add the dye to a washer half full of water.  DO NOT put the crinoline in before this step.  Agitate the dye and water for a few seconds. (about 5 seconds), to mix the dye evenly.  With you hands in heavy duty rubber gloves (so you don't end up with dyed hands) push the crinoline back into the washer. 


When putting the crinoline in the washer unzip it and put it around the spindle, almost as though you are 'dressing' it.  I did this because I was concerned about getting a tie-dyed look.  Fortunately it didn't. 

Once the crinoline is submerged in water, turn it back on and let it agitate on gentle.  Depending on how dark you want the crinoline you may want to do one or two bottles of dye.  Keep a sample of the color you are looking for near the washer so it's easy to compare.  Mine came out a little darker than I wanted but since it was under my gown and the only pink was my crinoline and flowers the color was fine.  Deeper colors may need more dye. 

After you have allowed the crinoline to agitate for the desired amount of time, let the wash cycle finish. Be sure the water runs clear to avoid staining the inside of your dress the color of your crinoline. This is  doubtful, as you would have to go swimming in them, but still…).

Finally, hang to dry in the bathroom. 

I hope you enjoy your crinoline and it's hint of color to accent your wedding day.

If you want photos and additional directions try: http://www.ehow.com/how_4679699_dye-crinoline-slip.html.  Sometimes pictures are worth a thousand words! 


Draping Ceilings for the DIY Bride

Dyning Shades Photo Courtesy of Shaded Nation
Product from Ikea

Ikea makes a 'Dyning Shade,' (shown above in a picture by Shaded Nation), which is a great option for DIY brides who want to add a canopy effect to their outdoor wedding. This is a great inexpensive option for draping outdoors. Head over to your local Ikea store and check these out, they are a budget friendly $25.00 each. These shades, that look like sails, give a decorator look to your wedding. The shade comes complete with hooks and cords to hang it from columns, lamposts or trees. For indoor events you can get some extra strong magnets with a built-in hook (Model# 07218) from Northern Tool that cost less than three dollars which will let you clip it to the ceiling. Add drama and break up the space of your event space without spending a fortune.

Monday, May 24, 2010

DIY Flower Girl Fairy Wands or You Can Let Your Florist Do the Work


Above photos from: http://www.weddingbee.com/

Flower girls may not be old enough to manage to carry a basket without losing all the blooms at the back of the aisle.  To be sure she arrives with all her flowers try making or having your florist make a 'fairy wand'.  Since tiny hands have problems manipulating pomanders and walking at the same time these fairy wands are a perfect solution.  There are how to directions all over the web for making them with either real or silk flowers.  Since most flower girls love to save their wedding finery, you might want to consider making her a silk one instead of real flowers so she can show it to all her friends, not to mention use it for Halloween!  These are easy to make (even I, the least crafty person, has no problem pulling this together).